Technical writing with JetBrains' Writerside and Grazie

Technical writing with JetBrains' Writerside and Grazie

The docs as code trend, where technical writers and developers work more closely using similar tools and processes, has grown in the past few years.

For some tech writers, who come from technical backgrounds, have always worked on technical projects, or were able to pick their toolchain, it’s the only workflow we’ve ever known.

Developers use myriad tools and frameworks daily, many of which tech writers will also find useful. One such tool is the IntelliJ-based suite of “integrated developer environments” (IDEs). It has always supported some of the basic features someone writing documentation might find useful, such as language support for Markdown, but until recently, it lacked anything more than that. JetBrains, the company behind IntelliJ, recently released two early access plugins that aim to take that foundation and add more valuable tools for tech writers working with their tools. These plugins are Grazie and Writerside.

Video version

Grazie

Grazie is for spelling and grammar checking text, technically known as “linting”. There are two versions of Grazie.

The default versionuses LanguageTool under the hood to run a variety of checks locally in your IDE on text in markup languages and code comments. It’s included in IntelliJ-based IDEs by default.

The professional version uses the default version as a dependency and adds a handful of features on top. This includes Vale (which I contribute to) for checking against style guides, language completion, transformations (for issues), and types of language highlighting. These all happen locally, but if you are willing to connect to JetBrains’ forthcoming cloud offering, Grazie professional also offers rephrasing, definitions, and translations in addition to “smarter” versions of the default features.

JetBrains sent me an invitation to the cloud offering, so in this post, I look at how full-blown Grazie compares to my current setup, which is VSCode + Vale for local, “non-smart” checks plus Grammarly for cloud-based “smart” checks.

Hands-on

With both plugins installed, I connected to the cloud version, but I will highlight which version generates which issue. I’m using the n8n docs as a source as I recently worked on them, but they also use Vale, so it allows me to test various aspects.

You can find various configuration options under the Settings > Editor > Natural Languages section. There are a lot to tweak, so it’s overwhelming and probably best to leave the default, to begin with, and configure as you need.

Screenshot of Grazie language settings

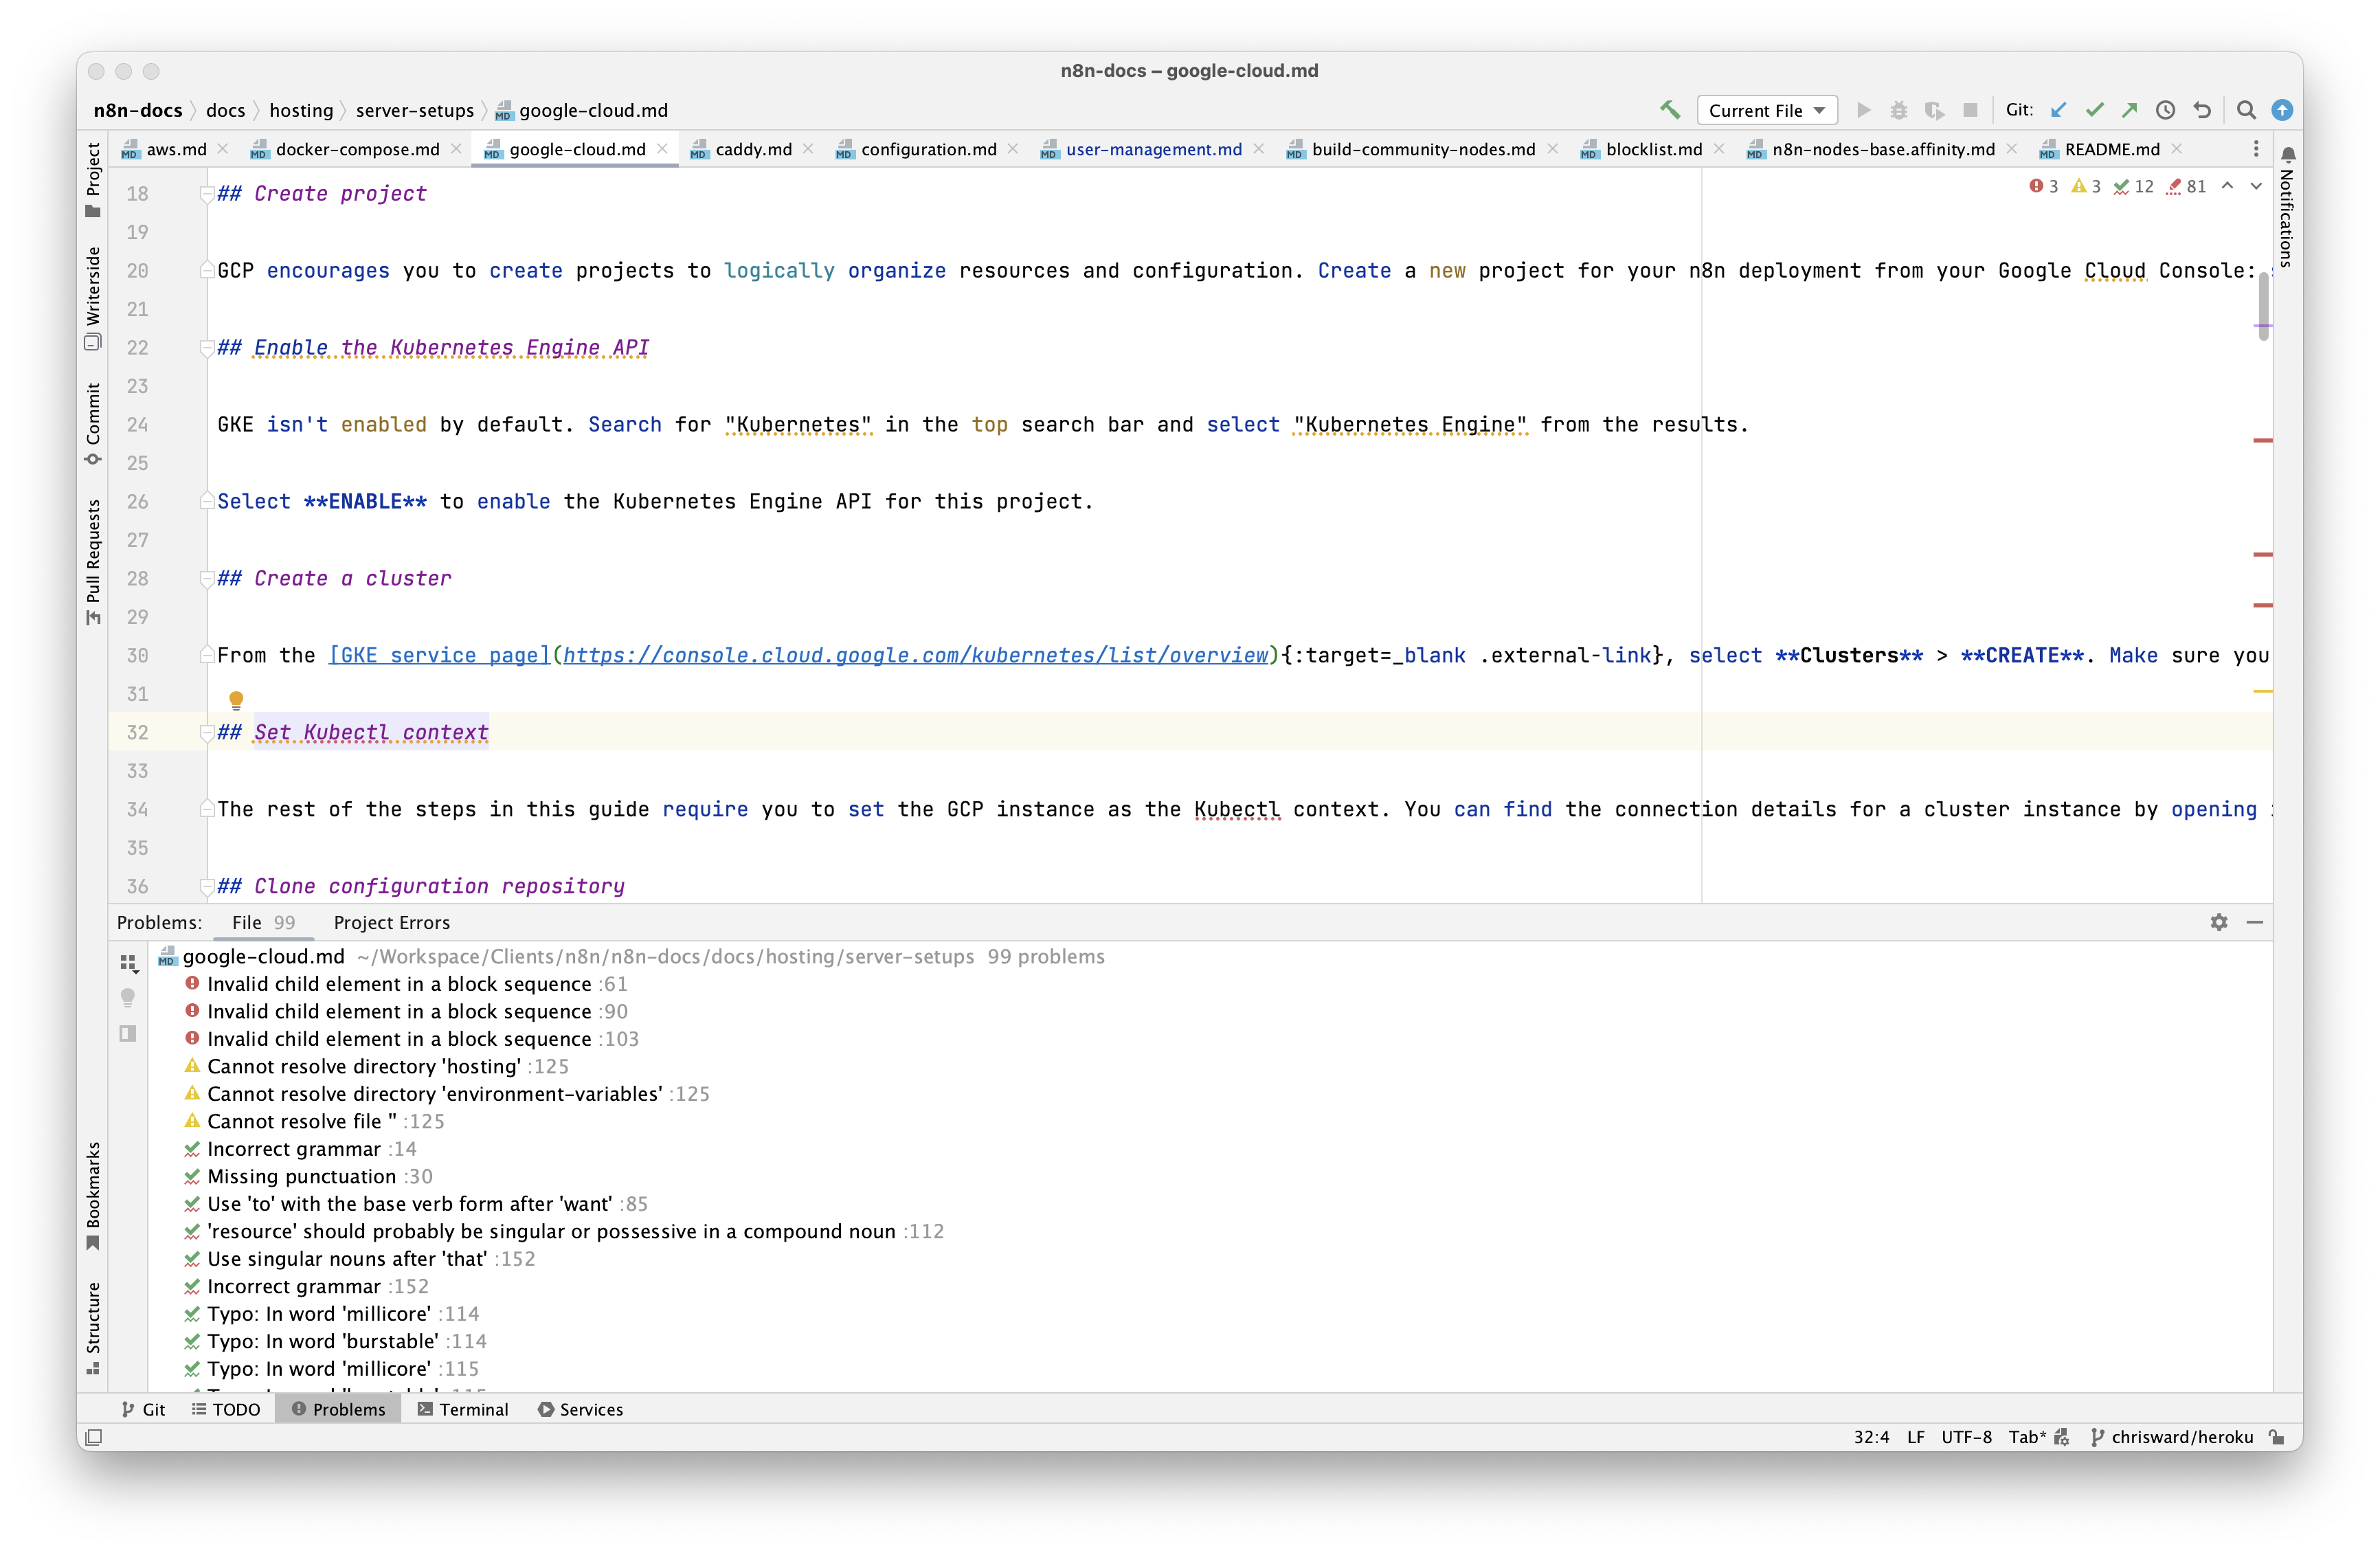
I start with the Vale options, as that’s my main point of comparison. Issues found by Vale show similarly to in VSCode, i.e., inline with a “squiggly” line or in a Problems panel.

The Vale integration is “read-only”, in that Grazie only shows issues, but doesn’t offer any options to fix them, update any word lists, etc. Vale doesn’t offer this by default anyway, and plugin implementors need to add it themselves. The VSCode extensions offer some limited options, so it’s only slightly better.

Screenshot of Grazie using Vale to highlight issues

The Vale integration isn’t quite the same as “Vanilla” Vale, only supports some extension points,, and you have to rename any existing configuration files you might have.

Almost all other features of Grazie and Grazie professional happen in the editor and are context-sensitive, depending on the issue detected. For example, if some text is passive voice, Grazie highlights the potential issue. Grazie professional offers suggestions on how to fix it.

For other features that aren’t necessarily issues, you typically right-click on text to access them.

Screenshot of Grazie translation

For example, to translate content with Grazie Pro (cloud), select the text, hit Alt+Enter and select Translate with Grazie.

Screenshot of Grazie autocomplete

Text completion is another interesting feature available in Grazie professional (with superior suggestions if you connect to the cloud). You can configure it to show AI-generated suggestions inline or in a pop-up. If you use the pop-up mode, Grazie displays multiple suggestions and can complete more than one word at a time. The suggestion generation is sometimes a little sluggish to trigger and not as good (whatever that means with regard to AI-generated suggestions) as some other services, but always, it’s useful to have.

Writerside

While IntelliJ IDEs support basic functionality for many common markup languages such as Markdown, asciidoc, and RsT, Writerside adds more nuanced organisational and management features.

Currently, these features work with Markdown or JetBrains own XML-based format, but perhaps other languages will be supported in the future. Writerside takes the “topic-based” approach to authoring. This encourages you to chunk content into “topics” (install tool, setup tool, etc., for example) which you then arrange into output rather than just writing a tutorial from start to finish (“docs as code”).

I am not going to embark on a discussion on which approach is “better”, but using Writerside may feel different from what many documentation writers are used to.

The features include:

  • Custom markup: Every markdown flavour needs its own custom syntax, and whether you use Writerside’s or its XML format, you get access to options such as:
    • Collapsible blocks
    • Admonitions (warning, error, etc.)
    • Tabs
    • Tooltips
  • Content reuse: Reusing and remixing pieces of content across different output formats is fundamental to topic-based writing. Even if you don’t take that approach to its full extent, you can keep common content items such as a beta warning as an include and have one source of truth.
  • Content management: As topic-based writing can have more complex structures, managing content is typically more rigid than the docs as code approach. Writerside helps by providing a UI for managing topics and the table of contents and navigation that binds the topics together when rendered.
  • Preview and build: A content creation tool only takes you so far as you can’t get your work to the outside world. As Writerside uses custom markup flavours, you have to build and serve with its provided commands. This limits you to serving the HTML it generates, or via provided pipelines to publish with GitHub, GitLab, or TeamCity. This isn’t any different from any other docs-focussed static site tool but it does mean you have to migrate any existing documentation if you want to use Writerside, or write your own build configurations.

Hands-on

Once you enable the plugin and create a Writerside project, it adds UI elements to create modules for the project and topics for each module.

Screenshot of Writerside interface

When you create a Writerside project, the plugin adds several new UI elements that help you manage the instances (The “thing” to document) and the topics (the documentation content).

You use the lower pane to interact with topic-related features such as management and creating templates. You use the upper pane to manage project-wide features such as rendering to HTML.

Most of the other functionality takes place in the editor as you write and is mainly in the form of custom markup. The custom markup takes a couple of different forms.

Custom elements vary depending on if you use Markdown or semantic markup. For Markdown, it leverages some form of existing syntax with properties set in curly braces.

For example, a note-style admonition:

> Just FYI.
> 
{style= "note"}

And the same in semantic markup is XML-style, for example:

<note>
	<p>
		Just FYI.
	</p>
</note>

Many are available, and you can find the contextual list by typing < or { as appropriate. You can also find a complete list in the documentation.

Content reuse, or “single-sourcing”, is another useful feature for tech writers that other tools often cobble together. There are numerous ways to do this with Writerside, but the one that interests me most is “snippets”.

First, you mark the pieces of content you want to reference with an ID, using the id property in either Markdown or semantic markup.

And then, in either Markdown or semantic markup, you can use the following code, referencing the file and the ID:

<include from="warning_library.md" element-id="generic-warning"/>

There are other ways you can finesse this with Writerside, depending on how long or short the snippet is and if you want to include variables etc. Find more in the documentation.

Would I switch from VSCode?

In this article, I covered just some of the features of the Writerside, Grazie, and Grazie Professional. There are many more features I didn’t cover, and they are all in rapid development, so they likely have more features to come.

But would I switch from my VSCode setup?

Hmm… At this point, probably not. I still find the JetBrains UI too OS non-standard for my tastes. I know how ridiculous this sounds, as VSCode is also OS non-Standard, so maybe I am more used to it. JetBrains is testing a new interface for IntelliJ-based IDEs that I will try soon, which may sway my opinion.

I work almost exclusively with Markdown, and while it supports most of the Writerside features, it feels a slight second-class citizen to using semantic markup. I never use topic-based content either, which Writerside is optimised for. And there is the main issue with Writerside. It would help to switch your entire toolchain to leverage most of its features. This is OK, but it is an undertaking many teams may not take immediately until there is more tooling around it. The team is building more CI integration and predicts there will be a cloud hosting option at some point.

Grazie and Grazie professional are useful tools. Again, I need more configuration to transfer into CI processes, version control, among teammates etc., which I can do with my current VSCode plugins setup. If these aren’t essential to you or all your other writers and developers using JetBrains tools, then the plugins are fantastic. If you require further integration points, they may not be fully useful to you… yet.